Custom email signatures
Some business workflows require email template signatures to be updated so outgoing communications display the appropriate contact information for customer follow-up and correspondence.
This is particularly important when responsibility for a customer opportunity is shared between team members. In these cases, the employee responsible for managing quotes and customer communications may differ from the employee associated with the sales order for commission purposes.
Email templates default to the signature of the employee assigned to the record; therefore the template should be modified to display the contact information of the employee responsible for customer follow-up. This ensures customers know who to contact with questions, approvals, and other correspondence.
Note
The Sales: Order Confirmation email template is used as the example throughout this article to
demonstrate how email signatures can be customized.
Open the email template
To modify an email template, first activate developer mode, then
navigate to . Click on the email
template being modified, in this case, the Sales: Order Confirmation template.
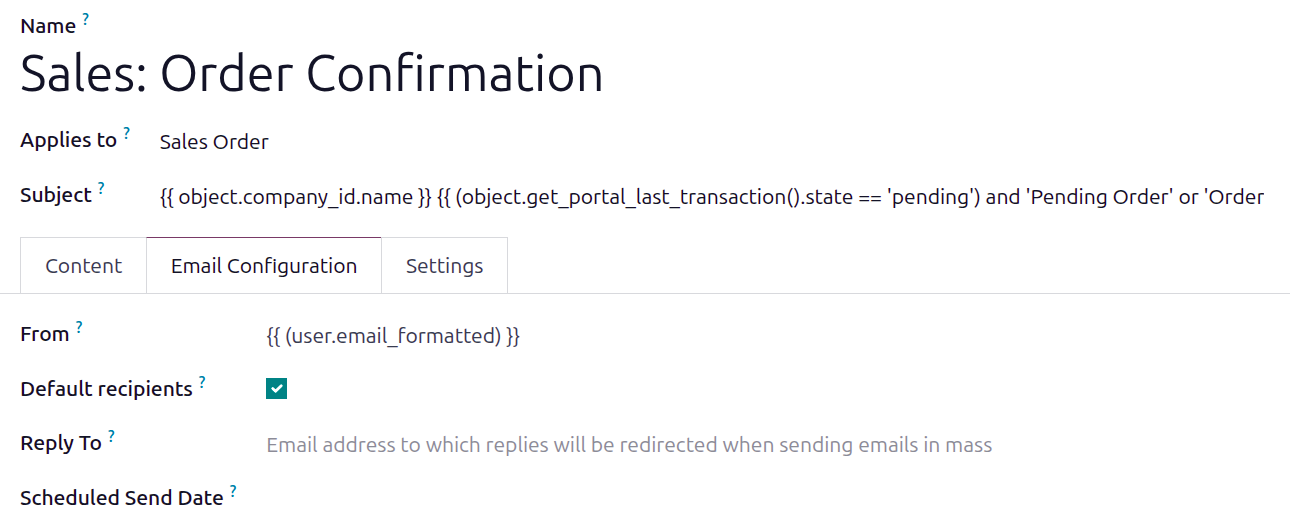
Update from field
On the email template, open the Email Configuration tab. Delete the default text in the
From field and replace it with: {{ (user.email_formatted) }}.
Modify the code
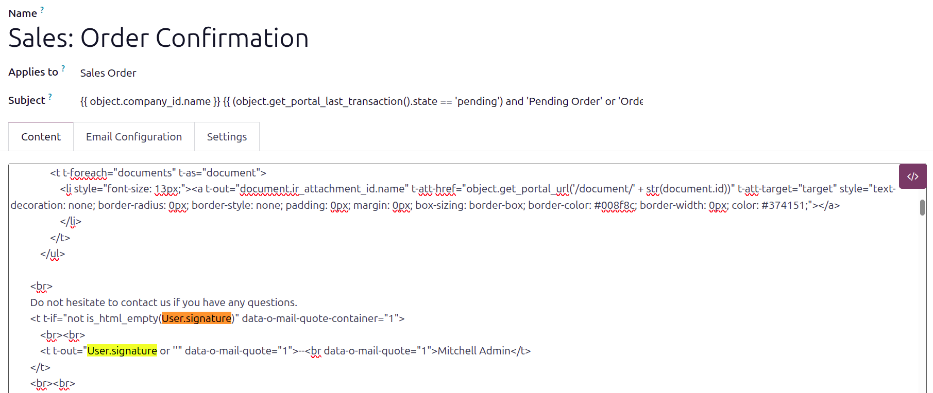
Click the Content tab, and highlight some text so the toolbar is visible. Click the </> (Code view) button and the text changes to code.
Search the code for signature to find the two instances of the code object.user_id.signature.
Replace both object.user_id.signature instances with User.signature.
Tip
If a user has not set up their email signature, instead of having the default Mitchell Admin
populate the signature, the company name can be displayed instead.
To do this, search for Mitchell Admin in the code, and replace it with the company name.