Physical rental products
The Odoo Rental app allows users to customize scheduling, pricing, and inventory for physical rental products that require stock movement, otherwise known as Goods. Users can set up multiple pickup and drop-off locations and track rental products by serial number.
Settings
The Rental app offers many app-integration features. Depending on the installed Odoo apps, specific settings are available. To learn more about the default setting for rental products, refer to the Settings section of the Rental product type page. The following configurations assume the Rental and Inventory apps are installed.
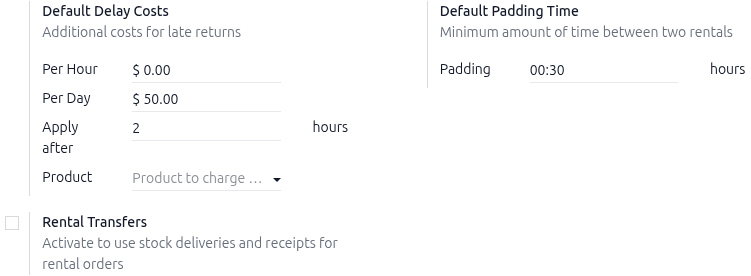
Navigate to , configure the Default Delay Costs in the Rental section for late fees. Optionally, configure the Default Padding Time to make rentals unavailable for booking. Refer to the Rental Transfers feature section to learn what it does and how to configure it.
In the Rental section, under the Default Delay Costs subsection, fill in the Apply after field.
Note
For more control, configure the costs of late returns in the Per Hour and Per Day fields on the product form. If the defaults apply to all products, leave the Product field blank.
Click Save to apply the changes.
Create a new physical product
To set up a new physical rental product, go to the , then click New. On the rental product form, fill out each tab accordingly:
General Information tab
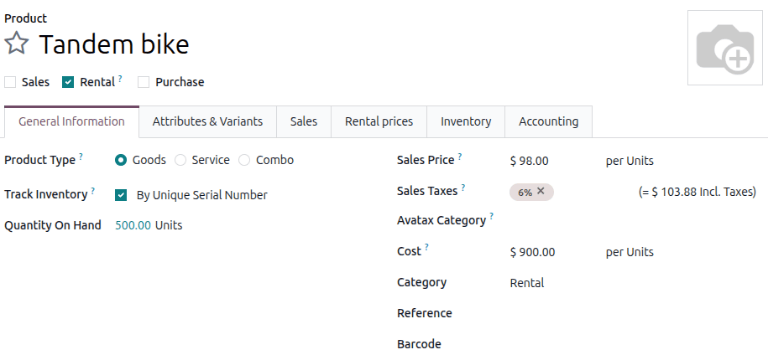
In the new product window, the Rental checkbox is already ticked by default. Select the Product Type as Goods.
Tick the Track Inventory checkbox and select By Quantity from the drop-down menu. For the Category field, select Goods from the drop-down menu or create a new category by typing in the name and clicking Create.
Attributes & Variants tab
Important
The Variant feature in the Inventory app must be enabled for this tab to display.
Click Add a line, then select a default option from the Attribute drop-down menu. To create a new one, enter the name, then click Create and edit… to configure the attribute and its values.
Rental prices tab
Click the Rental prices tab and in the Pricing section, click Add a price to enter a new rental rate. Choose a pricing period (the unit of duration of the rental) in the Period column, or create a new pricing period by typing in the name and clicking Create and edit.
Note
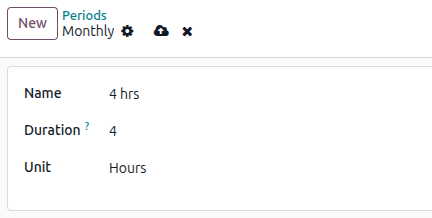
Creating a new pricing period opens a pop-up Create period window. Fill in the Name, Duration, and Unit, and click Save. The new pricing period automatically applies.
Next, enter the Price for that specific Period. To apply the configured rental rate to an existing pricelist, click in the Pricelist column and select the desired list from the drop-down menu.
In the Reservations section, fill in the Hourly Fine, Daily Fine, and the Reserve product time. These values are automatically populated from the Default Delay Costs section, provided they have been configured in the .
Click the (Save manually) icon near the top to save.
Example
A bike rental business rents tandem bikes for two hours at the local park. The hourly rental rate for their tandem bikes is $20, but since tandem bikes are popular, they want to set a new price of $35. To ensure the business gets their bikes returned on time, they set the late return fee as $20 per hour and $160 per day ($20 x 8 hrs).
Create a new pricing period by navigating to . Click New, then configure the period for 2 hours.
Navigate to the tandem bike product and in the Rental prices tab add the 2 hour
period set at $35. Manually save to apply changes.

Configure a physical rental product for product tracking
Important
To configure a physical rental product for product tracking, the Inventory app must be installed, and Lots & Serial Numbers must be enabled.
Go to the , then click New. In the new product window, the Rental checkbox is already ticked by default.
Select the Product Type as Goods. Tick the Track Inventory checkbox and select either By Lots or By Unique Serial Number from the drop-down menu.
For the Category field, select Goods from the drop-down menu or create a new category by typing in the name and clicking Create. Configure rental rates on the Rental prices tab. Click the (Save manually) icon near the top to save.
Rental Transfers feature
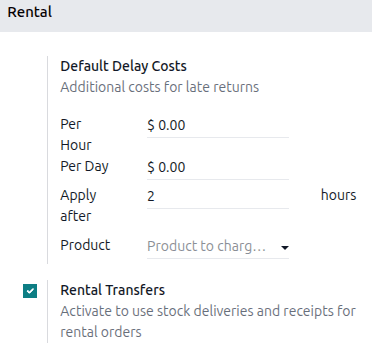
The Rental Transfers feature automatically creates a delivery receipt when the rental product is picked up and a return receipt when it is returned to stock. Documenting stock movement creates a clean paper trail and has a variety of uses:
Tracking high-value products.
Tracking stock levels across multiple stores or warehouse locations.
Tracking products between different store locations that allow pick up and returns.
To enable the Rental Transfers feature, navigate to the and in the Rental section, tick the Rental Transfers checkbox.
Note
The Inventory app automatically creates an internal default location once the Rental Transfers feature is enabled. Odoo uses the new default location, Customer/Rental, to track products during the rental period (moving them from Stock to Customer/Rental upon rental, and back upon return). Do not modify to avoid corrupting inventory tracking.
Multi-location management and transfers
Important
The Inventory app must be installed to set up this configuration. The Inventory app automatically creates an internal default location once the Rental Transfers feature is enabled. Odoo uses the new default location, Customer/Rental, to track products during the rental period (moving them from Stock to Customer/Rental upon rental, and back upon return). Do not modify to avoid corrupting inventory tracking.
Tracking the location of high-value physical products between locations is essential. The Rental app helps with the Rental Transfers feature. Activating rental transfers means the system treats rental movements similarly to sales, requiring a receipt and a delivery order every time a physical product is rented or returned.
For multi-location management and rental item transfer tracking, navigate to the and in the Rental section, tick the Rental Transfers checkbox.
Next, go to the and in the Warehouse section, tick the Storage Locations checkbox. Click Save to apply the changes.
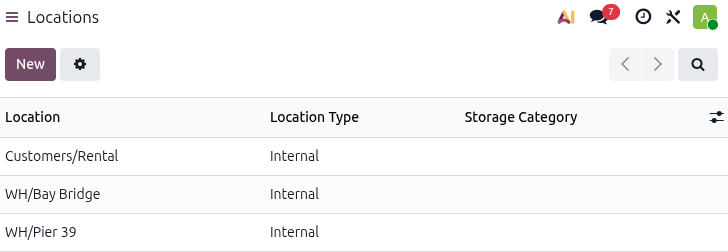
To configure new locations, navigate to . Click New to configure a new internal location.
On the new location page, enter the Location Name and ensure the Parent Location field is set to WH. Click the Save manually icon near the top to save.
Example
A bike rental business has two store locations within the same city. Both locations allow for pick-up and drop-off of their bikes. The company wants to track its bikes accurately at each location.
Ensure the Rental and Inventory apps are configured by enabling Rental Transfers in the Rental app and Storage Locations in the Inventory app.
Next, go to the . Create a new location for each storefront.
Pickup products
When a customer picks up products, navigate to the appropriate rental order, click Pickup. The Rental app displays a warehouse delivery form listing the reserved rental products. Click Validate to move the order to the Done stage.
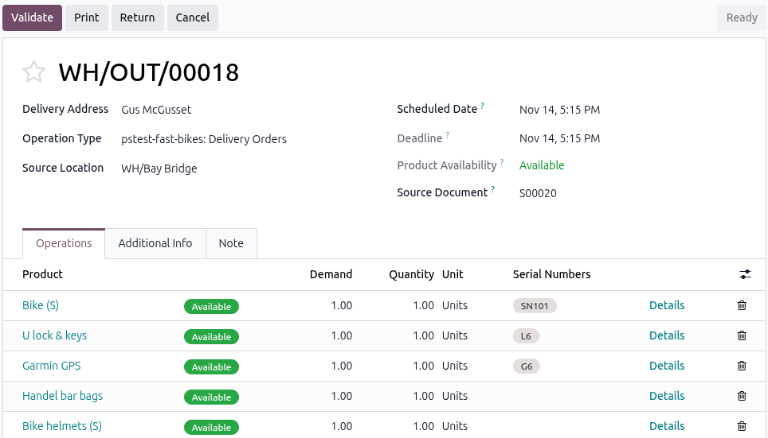
Doing so places a Pickedup status banner on the rental order.
Return products
When a customer returns products, navigate to the desired rental order and click Return. The Rental app displays a warehouse receipt form listing the checked-out rental products.
Enter the same number of products the customer returned in the Quantity column. If any of the products have serial numbers, enter them into the Serial Numbers column.
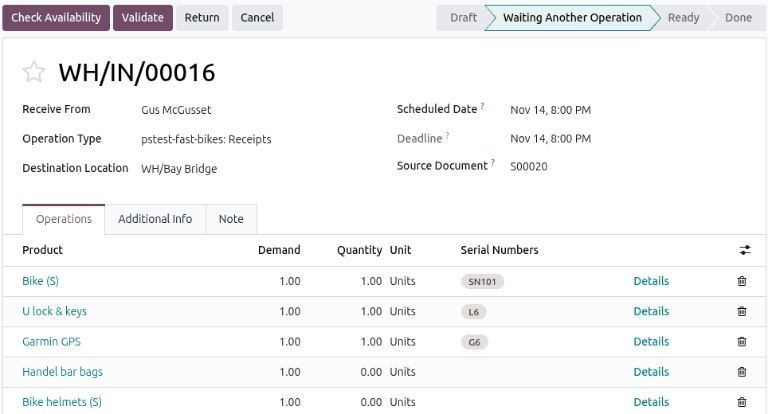
Click Validate to move the order to the Done stage. A Returned status banner appears on the rental order.
Print pickup and return receipts
Pickup and return receipts can be printed for customers when they pick up and return rental products.
To print pickup and/or return receipts, navigate to the appropriate rental order, click the (Actions) icon to reveal a drop-down menu.
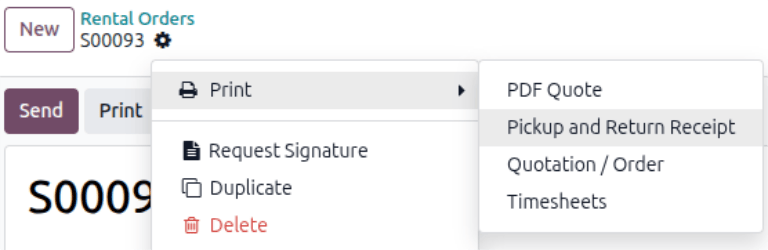
From this drop-down menu, hover over the Print option to reveal a sub-menu. Then select Pickup and Return Receipt.
Odoo generates and downloads a PDF detailing all information about the current status of the rented items.