
If you’re transitioning to Odoo from QuickBooks or Sage, you’ve likely spent years relying on a single, static field: the Default Vendor Expense Account. It’s a familiar comfort, you open a vendor card, assign an account, and walk away.
When you first open Odoo, you might notice that specific field is missing. But before you reach for the panic button, this isn’t a "missing feature", it’s an intentional upgrade.
In legacy systems, a default account is a blunt instrument. It assumes that every single thing you buy from a specific vendor belongs in the same bucket. Odoo, designed for modern, scaling businesses, replaces that static field with intelligent automation. Instead of one way to code a bill, Odoo gives you five smarter ways to ensure your books are perfect without the manual data entry.
Here is how Odoo empowers you to handle expenses with more flexibility and precision than ever before.
1. Bank Reconciliation Models: The "Set and Forget" Automation
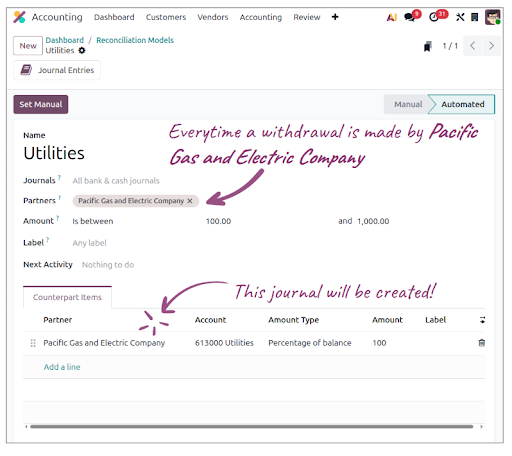
In Odoo, the bank feed isn't just a list of transactions; it’s a powerful engine for your ledger. Bank Reconciliation Models allow Odoo to recognize vendors and automatically suggest (or even post) the correct expense account based on the transaction metadata.
How to set it up:
Navigate to Accounting > Reconciliation (three dots on a journal) > Bank Reconciliation Models.
Click New and give your model a name (e.g., "Monthly Internet Bill").
Set your Conditions: For example, "Label contains 'Comcast'" or "Partner is 'Comcast'."
Under the Action tab, select the correct Account (e.g., Communications Expense).
Bonus Control: You can set a Lower/Upper amount limit. This ensures that if a bill is unexpectedly high, Odoo will flag it for manual review instead of auto-reconciling.
Why it’s better:
You aren’t just pre-filling a bill; you’re automating the entire reconciliation process. When the bank statement hits Odoo, the work is already done.
2. Bill Autocomplete: Leveraging Your History
Odoo is constantly learning from your behavior. If you’ve entered a bill for a vendor in the past, the Autocomplete feature uses that historical data to populate new entries instantly.
How to use it?
Create a New Bill.
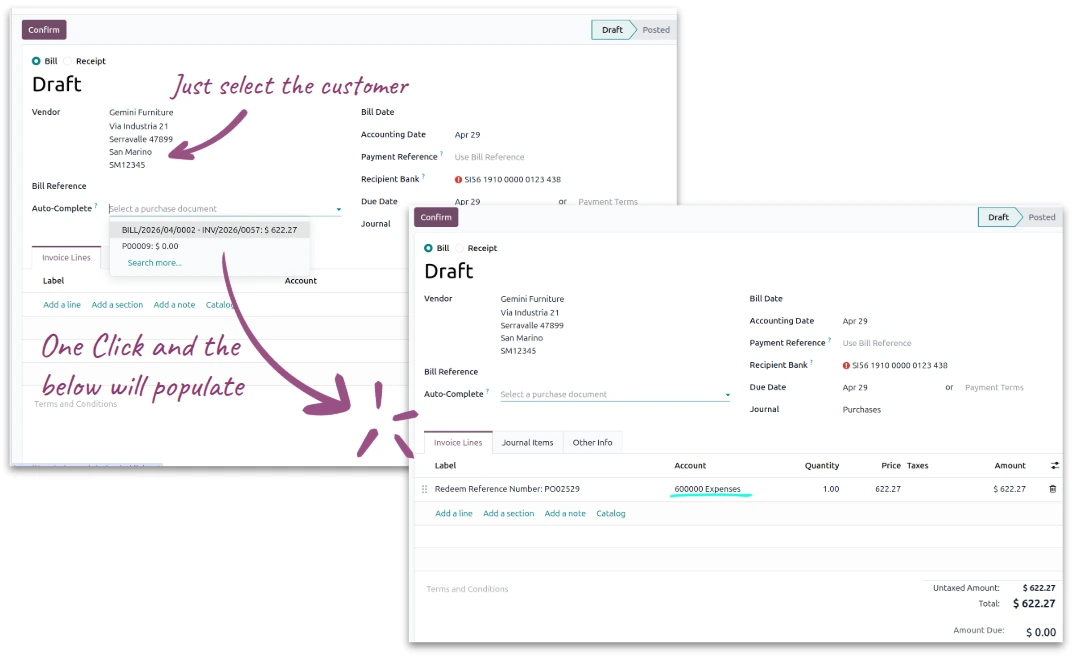
Select your Partner (Vendor).
In the Auto-complete field (usually at the top of the form), a dropdown will appear showing your most recent bills from that vendor.
Select the relevant past bill, and Odoo will instantly fill in the product lines, accounts, and taxes based on that previous record.
Why it’s better:
It offers "human-in-the-loop" speed. You get the benefit of a default account without being locked into one if this specific purchase happens to be different from the last.
3. Bill Duplication: The Two-Click Solution
Sometimes, the simplest path is the most effective. If you have a vendor that you bill irregularly but the details remain the same, Duplication is your best friend.
How to do it?
Go to your Bills list view and select the bill you want to mimic.
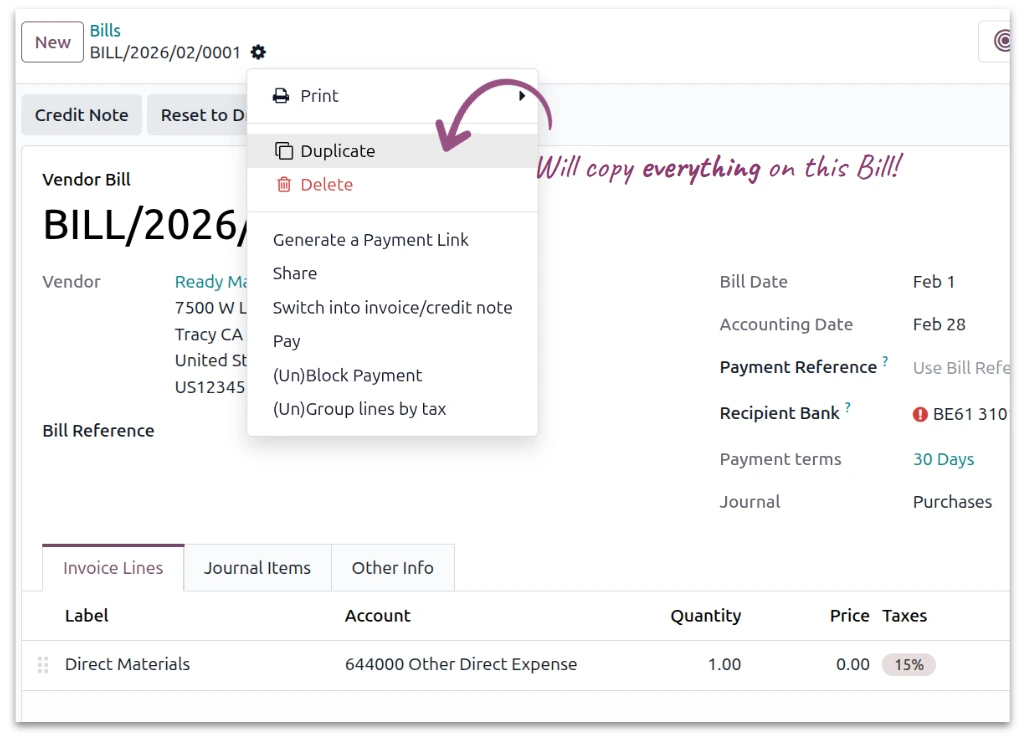
Click the Action gear/button at the top of the screen.
Select Duplicate.
Odoo creates a fresh draft with all the coding, accounts, and taxes intact. Simply update the Date and Total Amount, and you’re ready to post.
Why it’s better:
It eliminates the risk of "typo-driven" accounting errors. You’re starting from a known, correct entry every time.
4. Auto Post: Putting Recurring Bills on Autopilot
For fixed expenses like rent or software subscriptions, you shouldn’t be touching a bill every month. Odoo’s Auto Post feature turns a standard bill into a recurring powerhouse.
How to set it up:
Open a bill that you know will recur.
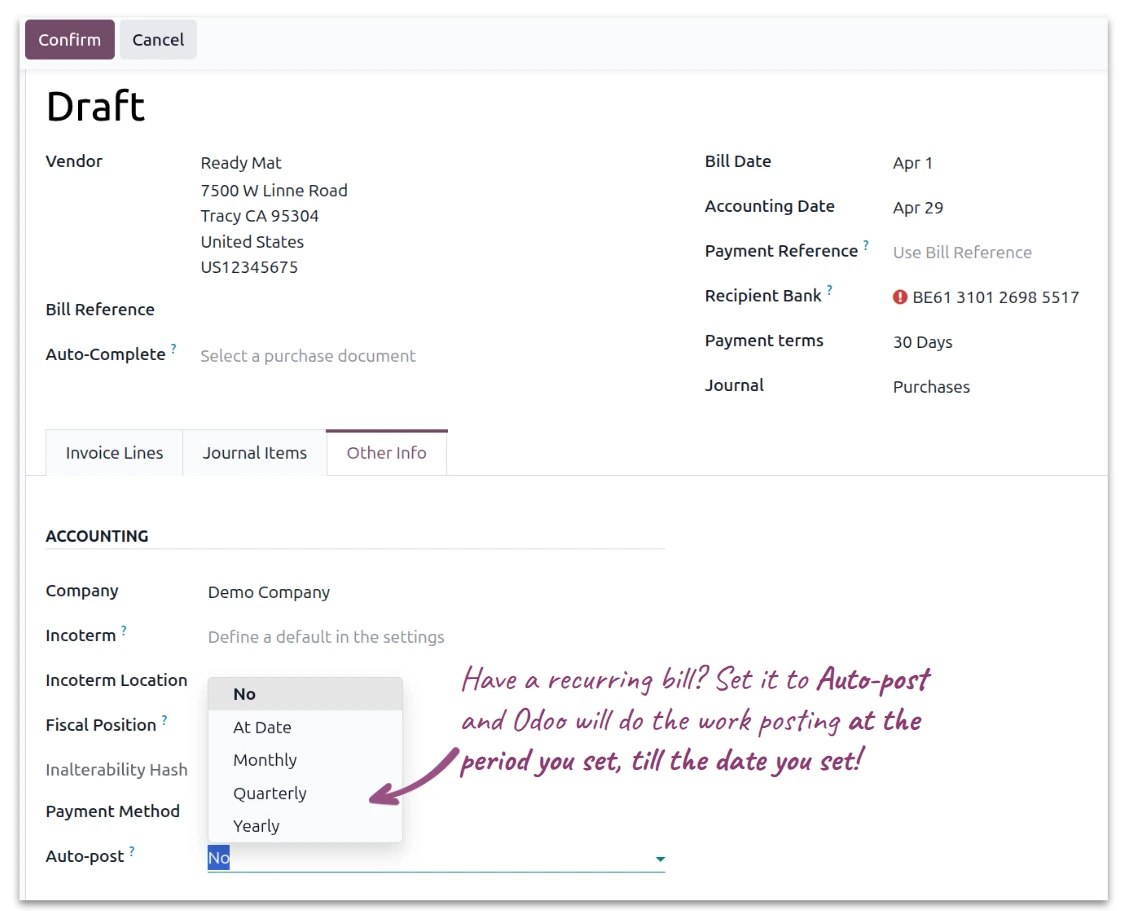
Go to the Other Info tab (or Advanced settings depending on your version).
Under the Automated Entries section, look for Auto-post.
Set the date you want the bill to move from "Draft" to "Posted" automatically.
Why it’s better:
This is true "hands-off" accounting.
5. Product Categories
The most sophisticated way to handle expenses in Odoo is through Product Categories. This is the "Odoo Way", it shifts the logic from the Who (the vendor) to the What (the item).
How to set it up:
Create a generic "Service" product for your common expenses (e.g., "Electricity," "Office Supplies").
Go to Accounting > Configuration > Product Categories.
Create a category (e.g., "Utilities") and set the Expense Account right there on the category level.
Assign your products to that category.

Why it’s better:
Now, it doesn't matter which vendor you buy electricity from. Whether it's Vendor A or Vendor B, once you select the "Electricity" product on the bill, Odoo instantly routes it to the correct Expense Account. This gives you incredibly granular reporting and keeps your Chart of Accounts clean and organized.
Conclusion: Trading Training Wheels for an Engine
In QuickBooks and Sage, the default vendor account acts like training wheels, it keeps you upright, but it limits where you can go. Odoo removes those wheels to give you a high-performance engine.
By using Bank Models, Autocomplete, and Product Categories, you aren't just filling in boxes; you're building a system that understands the logic of your business. You’ll find that your data is more accurate, your month-end close is faster, and you’re spending less time in data entry and more time on the strategic insights that actually move the needle.
